Email with Postfix
Before we start, make sure that your internet service provider isn’t blocking tcp port 25 (smtp). I found that AT&T will unblock it for free; I just had to call and ask. Once that is done, we can proceed.
Configure Postfix for Sending Mail
- If you haven’t done so already, install ssl certificates. We will use the same certs for both https and for signing email.
- Allow smtp through the firewall. If you use firewalld,
# firewall-cmd --permanent --add-service=smtp # firewall-cmd --permanent --add-port=587/tcp # firewall-cmd --permanent --add-service=imap # firewall-cmd --reload - Install postfix.
# apt install postfix - Change or add the following options in
/etc/postfix/main.cf:myorigin = $myhostname inet_interfaces = all smtpd_use_tls = yes smtpd_tls_auth_only = yes smtpd_tls_received_header = yes smtpd_tls_cert_file = /etc/letsencrypt/live/subdomain.domain.com/fullchain.pem smtpd_tls_key_file = /etc/letsencrypt/live/subdomain.domain.com/privkey.pem tls_random_source = dev:/dev/urandom smtpd_tls_security_level = may smtp_tls_security_level = may inet_protocols = ipv4 alias_maps = hash:/etc/aliases alias_database = hash:/etc/aliases smtpd_sasl_type = dovecot smtpd_sasl_path = private/auth mailbox_transport = lmtp:unix:private/dovecot-lmtp smtpd_sasl_auth_enable = yes local_recipient_maps = proxy:unix:passwd.byname $alias_maps - Uncomment (or modify) the following lines in
/etc/postfix/master.cf:submission inet n - - - - smtpd -o syslog_name=postfix/submission -o smtpd_tls_security_level=encrypt -o smtpd_sasl_auth_enable=yes -o mtpd_sasl_type=dovecot -o smtpd_sasl_path=private/auth -o smtpd_reject_unlisted_recipient=no -o smtpd_recipient_restrictions=permit_sasl_authenticated,reject -o milter_macro_daemon_name=ORIGINATING - Restart postfix.
# systemctl restart postfix.service - If all is working properly, you should be able to send an email.
$ mail -s "subject" name@example.com
body of message
[CTRL+d]
If all is not working properly, inspect
/var/log/mail.infofor details.
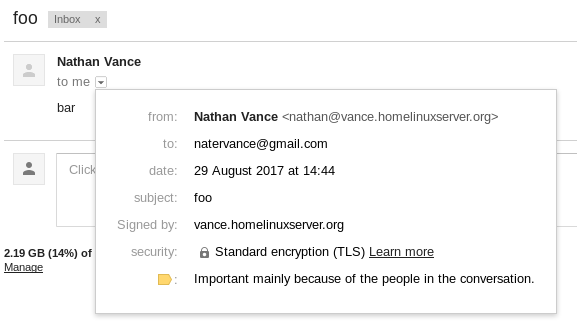
When you receive the email (perhaps at gmail), you should be able to verify that it is encrypted with TLS. However, if you use gmail, you’ll find that things aren’t entirely hunky dory:

The issue is that question mark. In my case, hovering over it displays the text Gmail couldn't verify that vance.homelinuxserver.org actually sent this message (and not a spammer).
The solution: Use DKIM to authenticate email. Ah, yes, yet another technology to throw into the mix. Here we go.
Authenticate Mail with DKIM
- Install opendkim.
# apt install opendkim opendkim-tools - Change or add the following options in
/etc/opendkim.conf:UMask 007 Domain subdomain.domain.com KeyFile /etc/dkimkeys/dkim.key Selector mail Canonicalization relaxed/relaxed - In
/etc/default/opendkim, uncomment the line:SOCKET=inet:12345@localhostDisclaimer: This doesn’t actually do anything in Debian 9. You’ll also have to modify the service file,
/lib/systemd/system/opendkim.service, which passes the socket in as an argument:ExecStart=/usr/sbin/opendkim -x /etc/opendkim.conf -p inet:12345@localhostAs always when modifying a .service file, reload the daemons with
systemctl daemon-reload. - Edit
/etc/postfix/main.cfto account for DKIM.# DKIM milter_default_action = accept milter_protocol = 2 smtpd_milters = inet:localhost:12345 non_smtpd_milters = inet:localhost:12345 - Generate dkim keys and move the private one to the proper location.
# opendkim-genkey -t -s mail -d subdomain.domain.com # mv mail.private /etc/dkimkeys/dkim.key # chown opendkim:opendkim /etc/dkimkeys/dkim.key - The file mail.txt (generated along with mail.private in the previous step) contains the public key information. Mine looks like this:
mail._domainkey	IN	TXT	( "v=DKIM1; h=sha256; k=rsa; t=y; "
	"p=MIIBIjANBgkqhkiG9w0BAQEFAAOCAQ8AMIIBCgKCAQEA9VI66HU8kitypUPGrZbajuWM1tqCDhLuPafk5JMItKIspdBhTO8YxXj2we01Yba21H0JCjROroy23I0r2XT2tmkfsY4q3KhsZlV/UUEH1RohLjmEOYqtRJATUtEdJxG0Pp3KW96L4fTHaabzXsDcdVyJE++I/OvU9NL+UUw4izbYzadBOrU0IDqDoD86Kv5OO3WMK1VNQ97qss"
	"iqAmhBQHrrEsFHmrjxhdaTfBpqxjqZdfvolGkzqEHInJMHmd54msFxJOdLYfvqn8lp6B5+J0islBisAd36wpNxWry8AwB7McxtK9nn+z4s/FYKGaqykaaAYXyer52FPhuM1u1SDwIDAQAB" )  ; ----- DKIM key mail for vance.homelinuxserver.org
Go to FreeDNS and create a TXT record. For the subdomain, enter
mail._domainkey.subdomain, and for the destination, enter the parts ofmail.txtin quotes:"v=DKIM1; h=sha256; k=rsa; t=y; " "p=MIIBIjANBgkqhkiG9w0BAQEFAAOCAQ8AMIIBCgKCAQEA9VI66HU8kitypUPGrZbajuWM1tqCDhLuPafk5JMItKIspdBhTO8YxXj2we01Yba21H0JCjROroy23I0r2XT2tmkfsY4q3KhsZlV/UUEH1RohLjmEOYqtRJATUtEdJxG0Pp3KW96L4fTHaabzXsDcdVyJE++I/OvU9NL+UUw4izbYzadBOrU0IDqDoD86Kv5OO3WMK1VNQ97qss" "iqAmhBQHrrEsFHmrjxhdaTfBpqxjqZdfvolGkzqEHInJMHmd54msFxJOdLYfvqn8lp6B5+J0islBisAd36wpNxWry8AwB7McxtK9nn+z4s/FYKGaqykaaAYXyer52FPhuM1u1SDwIDAQAB"Of course, it won’t work if you use my public key, so use your own :). The reason why the key is split into 3 strings is that TXT records can’t contain chunks larger than 255 bytes.
- Start opendkim and restart postfix.
# systemctl start opendkim
# systemctl restart postfix
Now when you send an email, gmail can verify that it was you who sent it.
You can stop there if you prefer to do everything on the command line over ssh. However, if you wish to use an email client, then proceed to set up imap with Dovecot.
IMAP with Dovecot
- Install Dovecot.
$ sudo apt install dovecot-core dovecot-imapd dovecot-sieve dovecot-lmtpd - Wipe out
/etc/dovecot/dovecot.confand replace it with the following (as always substituting your address forsubdomain.domain.com):auth_username_format = %Ln disable_plaintext_auth = no mail_location = mbox:~/mail:INBOX=/var/mail/%u mail_privileged_group = mail namespace inbox { inbox = yes mailbox Sent { auto = subscribe special_use = \Sent } mailbox Trash { auto = subscribe special_use = \Trash } } passdb { args = %s driver = pam } plugin { sieve = ~/.dovecot.sieve } protocols = " imap lmtp" service auth { unix_listener /var/spool/postfix/private/auth { group = postfix mode = 0660 user = postfix } } service lmtp { unix_listener /var/spool/postfix/private/dovecot-lmtp { group = postfix mode = 0600 user = postfix } } ssl = required ssl_cert = </etc/letsencrypt/live/subdomain.domain.com/fullchain.pem ssl_cipher_list = ECDHE-RSA-AES128-GCM-SHA256:ECDHE-ECDSA-AES128-GCM-SHA256:ECDHE-RSA-AES256-GCM-SHA384:ECDHE-ECDSA-AES256-GCM-SHA384:DHE-RSA-AES128-GCM-SHA256:DHE-DSS-AES128-GCM-SHA256:kEDH+AESGCM:ECDHE-RSA-AES128-SHA256:ECDHE-ECDSA-AES128-SHA256:ECDHE-RSA-AES128-SHA:ECDHE-ECDSA-AES128-SHA:ECDHE-RSA-AES256-SHA384:ECDHE-ECDSA-AES256-SHA384:ECDHE-RSA-AES256-SHA:ECDHE-ECDSA-AES256-SHA:DHE-RSA-AES128-SHA256:DHE-RSA-AES128-SHA:DHE-DSS-AES128-SHA256:DHE-RSA-AES256-SHA256:DHE-DSS-AES256-SHA:DHE-RSA-AES256-SHA:AES128-GCM-SHA256:AES256-GCM-SHA384:AES128-SHA256:AES256-SHA256:AES128-SHA:AES256-SHA:AES:CAMELLIA:DES-CBC3-SHA:!aNULL:!eNULL:!EXPORT:!DES:!RC4:!MD5:!PSK:!aECDH:!EDH-DSS-DES-CBC3-SHA:!EDH-RSA-DES-CBC3-SHA:!KRB5-DES-CBC3-SHA ssl_dh=</etc/nginx/dhparams.pem ssl_key = </etc/letsencrypt/live/subdomain.domain.com/privkey.pem ssl_prefer_server_ciphers = yes userdb { driver = passwd } protocol lmtp { hostname = subdomain.domain.com info_log_path = /var/log/dovecot-lmtp.log lda_mailbox_autocreate = yes lda_mailbox_autosubscribe = yes log_path = /var/log/dovecot-lmtp-errors.log mail_plugins = " sieve" postmaster_address = yourname@subdomain.domain.com } - Restart postfix and dovecot.
$ sudo systemctl restart postfix $ sudo systemctl restart dovecot - Connect to your server using imap. The connection is authenticated with an unencrypted password, but don’t worry since it’s tunneled using STARTTLS.
Something we did in the previous section was install sieve, which is a mail filtering language. In the current configuration it doesn’t do anything. But, it’s possible to use sieve to automatically organize your mail. To use this feature, create the file ~/.dovecot.sieve containing something like the following:
require ["fileinto"];

if header :matches "Subject" ["*foo*", "*bar*"] {
        fileinto "Foobar";
}
This example puts all mail with a subject containing “foo” or “bar” in the folder “Foobar”. See this tutorial for more examples.